
Create Report
The create function for Report Builder can be described as a 3-part process. This process is applicable when creating reports for MBA Tool or Booking Portal.
1. Select Report Type & Define Template
The first is to select your report type and populate your report according to your required dimensions, metrics and saving your template. This step is necessary to define how you want to export your data into an csv/excel template for reporting and analysis purposes.
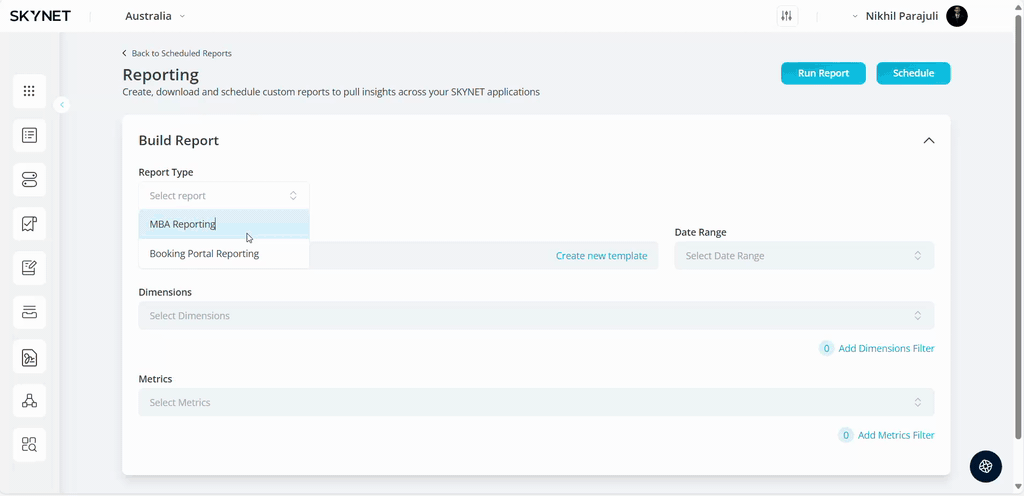
Select Report Type. Use the dropdown function to select either "MBA Reporting" or "Booking Portal Reporting".
| Report Type | Definition |
| MBA Reporting | Designed for obtaining all record of Standard & Express MBA listings for the available dimensions and metrics. |
| Booking Portal Reporting | Designed for obtaining all record of External & Internal Bookings added with specified dimensions and metrics. |
Select Date Range. Use the dropdown to specify the reporting date range required for your report.
Select Template. Upon selection, the system defined templates and any existing custom templates should appear.
| Report Type | Definition |
| System Templates | Feature can only be defined & set by Admins. If System Template is selected, the new/existing template will be shared with all Skynet users to select & run reports. |
| Custom Templates | Feature are defined & set by Traders/Planners. If Custom Template is selected, the new/existing template will only be available to the user who have created it. |
2. Add/Remove Dimensions & Metrics
The second part of the Report Builder process is to either use pre-existing defined dimensions & metrics or customise the reporting fields to your preferred order before saving & exporting the report into excel.
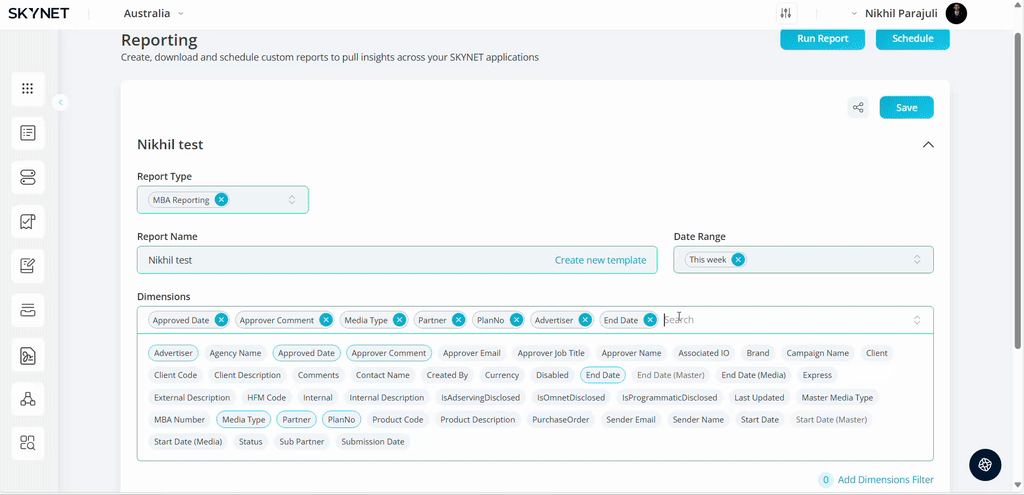
Add/Remove Dimensions. Upon selecting an existing report template, dimensions (column headers) will be pre-populated by default. These dimensions can be customized, and you can select the order of the dimensions.
Select Add Dimensions Options to Apply Filters. Use this feature to apply any additional filters according to the dimensions, conditions & values.
Add/Remove Metrics. Upon selecting an existing report template, metrics (column headers) will be pre-populated by default. These metrics can be customized, and you can select the order of the metrics.
Select Add Metrics Options to Apply Filters. Use this feature to apply any additional filters according to the metrics, conditions & values.
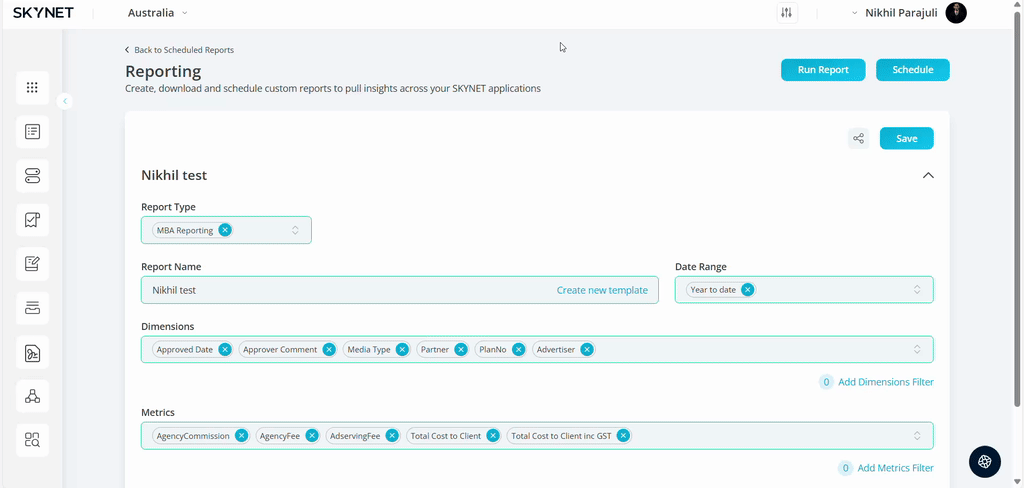
Click Save. Allows users to save the template for future use.
Delete Template. Select the X button to remove unwanted custom reporting templates. Only available for Custom Templates.
3. Run, Schedule & Email Report
The third part of the Report Builder process is to run the report to preview your report within the browser in a tabular view before exporting as a csv/excel file. This reflects the selected report template, report type, timings, dimensions, metrics, and media channels approved within your media plan.
Run Report. By running the report, it generates a sample report into a preview page before you can email the report data. The report will be collapsed under the report name and a reporting table with all information should be displayed.
Edit Report. If users want to add or remove any of the columns from the table, they can do so by expanding the report name dropdown by clicking the "Arrow" button next to the "Save" button. Upon making changes, hit save & run report to have the changes reflected to the report
Edit Report. If users want to add or remove any of the columns from the table, they can do so by expanding the report name dropdown by clicking the "Arrow" button next to the "Save" button. Upon making changes, hit save & run report to have the changes reflected to the report
Click Download. Situated under the title of your report above the tabular reporting view. The Download button allows the file to be emailed directly into your inbox by selecting “Yes” on the prompt message.
Click Email Report. This option is available upon clicking the “Schedule” button. Upon selecting, users can select the file format type csv/excel, input the email recipient to/cc and allow you to input a description of the report.
Click Send. Once you hit send, an email notification will be generated to the email inbox with the csv/excel file.
Click Schedule Report. This option is available upon clicking the “Schedule” button. Upon selecting, users can define the report name, input the email recipient to/cc, select the file format type csv/excel, define frequency of report (e.g. daily, weekly, fortnightly, monthly) and allow you to input a description of the report.
Share Report Template. Only Custom Templates can be shared to other Skynet users. Locate the “Share” button next to the save button to give other user email addresses permission to access the scheduled reporting template.